Guest post by Kelsey Lafleur. It's week 2 of Mamma Can Do It Legacy Winter Promos! You guys aren't going to want to miss this cute little lapped baby shirt. It's paired here with the baby boy leggings pattern. This simple and easy lapped baby shirt has been newly updated and is only $3.50 this week. I can see it becoming a staple in our house. We are also a cloth diaper family, and there's nothing I love better than a longer play t-shirt with a simple cloth diaper on hot summer days for my little guy. I know I seem crazy for even thinking about summer right now, but here in southern Alabama, our winter is almost over. This pattern also has long sleeves, short sleeves, as well as the tank binding option which was not previously available. The tank binding is included in the pattern, but it does not have the picture tutorial yet so that's what I'm here to tell you about.
Tank Lapped Baby Shirt Tutorial
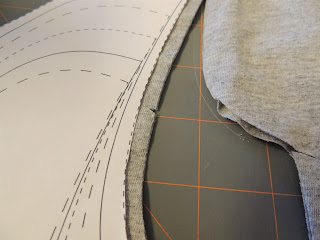
 I love to recycle old t-shirts for my kid's play clothes especially when the shirts don't have a side seam. It's a built in fold and you don't have to hem!! If you like your kid's t-shirts a little long like I do, then place the pattern piece at the bottom of the shirt hem. If you would like to keep the shirt the length of the pattern, then place the pattern bottom 1 inch below the shirt hem to account for the hem allowance. I just know you guys love my pattern weights here.
Note: There is a slight curved hem to the pattern, and so using the hem of this shirt will make the shirt have a straight hem instead of the intended slight curve.
Go ahead and cut out your front and back shirt pieces. I usually cut a little notch along the arm to help me keep track of which one is the front and which is the back.
Two notches for the back.
Cut out your two tank top arm bands.
Iron and press each arm band in half lengthwise. Mark the center of each.
Attach your neckbands according to the tutorial in the pattern.
 You will then overlap the back piece over the front. The overlap will measure 3 inches like shown in the pattern tutorial. Now if I were a good teacher, I would say you should baste along that 3 inch edge like so. I always regret not basting. Do as I say and not as I do. I did not baste.
 Find the center of the armscyle. Use the marked center of the tank band and match it to the center of the armscyle. Pin or clip at the center markings and match the end of your band with the end of the armscyle. Your lapped baby shirt will have the right side facing up.

Your band will be smaller than your armscyle so you will have to stretch the band as you clip around the armscyle. Since I didn't baste, I made up for it in over clipping. Sew your bands into place with a zig zag or similar stretch stitch. Your seam allowance will be 3/8ths of an inch here. I used a serger to sew mine onto the shirt.
You can topstitch your seams down here with a zig zag or stretch stitch, but I just left mine and pressed the seam inward. Now all you have left is to place your shirt right sides together and sew your side seams. I love when I don't have to hem at all!
I love it! Your little lapped baby tank is complete! I added a vinyl cut file design to mine from here. Little mister is ready for Valentine's Day now!
Disclaimer: This guest blog post does contain affiliate links.


No comments:
Post a Comment