Now you can make your own baby shirts with this Fitted Baby Shirt Pattern
With cold weather coming and steadily here, I have been getting worried about my baby's wardrobe. I did a quick search online for long sleeve baby shirt patterns, but nothing that I found fit the age ranges that I would need. I was looking for newborn - 24 months. All of the shirts that I had saved from my last baby were for warm weather. What about cold weather? Well, I stopped fretting and decided to get to work to create a new baby shirt design. After a couple weeks of design and sewing my own stash, I have finally finished the Fitted Baby Shirt Pattern. It is a very easy pattern that fits babies from a Tiny Newborn up to 36 months. There are 9 sizes that are all based on your child's current store bought clothing measurements.
If you would like to skip over all the reading about how I made the pattern, you can go directly to the fitted baby shirt pattern by clicking here.
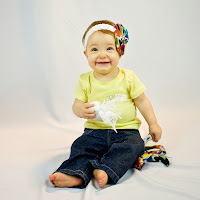
When I started with this design, I knew that I would want something to fit like a t-shirt, but a bit more snug than the average t-shirt. Personally, I think that my little munchkin looks especially great in a more fitted shirt, so that was what I was going for. In fact, I love how onesies fit, so I started modeling this design using my onesie pattern. I also wanted the baby shirt to be fitted for the simple fact that all of my baby clothes are worn multiple times in multiple ways. I wanted to be able to have a shirt be the main 'attraction' of an outfit, but wear it as an undershirt in a few days. Simple enough if it's fitted nicely.
I also wanted to make sure that
whatever shirt design I made, that it would be long enough. Either
all of the shirts in the store are too short, or all of my babies
have long bodies. I have never been able to find baby shirts that are
long enough for any of my little ones. Anytime a baby bends over,
their shirt rides half way up their backs. Or if daddy picks them up,
their whole tummy is exposed.
I say “daddy”, but it could be “sister” or “brother” or “grandma” or “babysitter” because no one is as picky about my baby's attire than I am. This fitted baby shirt pattern totally avoids all of that fussiness. It is long enough to cover a bending baby, a baby being held by someone else, snug enough to show off those yummy baby rolls and keep that back and tummy warm.
I say “daddy”, but it could be “sister” or “brother” or “grandma” or “babysitter” because no one is as picky about my baby's attire than I am. This fitted baby shirt pattern totally avoids all of that fussiness. It is long enough to cover a bending baby, a baby being held by someone else, snug enough to show off those yummy baby rolls and keep that back and tummy warm.
 What about sleeve length? That was my
next question. Have you been starting to notice that baby shirts'
sleeve length from store bought clothes are getting shorter?
Manufacturers are starting to make small adjustments like this to
save them money. It's hardly noticeable when a baby is getting into
new sizes. If you are like me, then you tend to have the baby in
their current size until you absolutely have to change them over.
When you do bring out the “next size” box, you find that the fit
is great in the arms, but a bit large around the body. Does this
sound familiar? By the time your baby fully fills into the current
size, the sleeves are too short. With all this in mind, I knew that I
wanted to make sleeves that fit great for this baby shirt pattern.
 The neckline of this fitted baby shirt pattern took a bit of trial and error to design. To be honest, I am not crazy about lapped shoulders so I was trying a variety of different ways to make the neckline differently than the typical baby shirts that you find at the store. Don't get me wrong, I like lapped shoulders for a newborn, but when the child gets older, I don't particularly like how the shoulders end up sticking up through the neckline of the baby shirt. People are always worried about attaching binding, so I knew that I should design the baby shirt pattern to be especially suited for beginners. I like fast and easy, so I went with my favorite neck line – the t shirt neckline. It uses binding just like your favorite t shirt. It is incredibly easy and fast to attach compared to other methods. You don't have to buy any extra fabric to make the neckline, it uses the knit fabric that you are already using for your fitted baby shirt pattern.
Using a sewing machine vs serger also
came up in my baby shirt pattern design process. I really like to use
my serger with clothing. However, my sewing machine works great too.
I have a very basic sewing machine that doesn't have a cover stitch
(like some people recommend), but I do have a zig-zag stitch and
elastic stitch. Few people realize that an elastic stitch works great
with clothing. If you adjust it properly, from the outside, it looks
like a straight stitch. Yet, it has the same give to stretch as a
zig-zag stitch. I decided to include instructions for both in the
baby shirt tutorial.
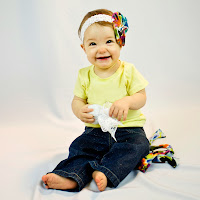 After I made this fitted baby shirtpattern, I loved the fit so much that I realized that I also need a
baby dress that fits like this. With a dress comes leggings, so I
decided to make a three part series. I call it the “Emma Series”.
It includes the following sewing patterns: The Fitted Baby Shirt
Pattern, The Baby Leggings Pattern and the Knit A Line Baby Dress
Pattern. Be watching for the rest of the Emma pattern series.
After I made this fitted baby shirtpattern, I loved the fit so much that I realized that I also need a
baby dress that fits like this. With a dress comes leggings, so I
decided to make a three part series. I call it the “Emma Series”.
It includes the following sewing patterns: The Fitted Baby Shirt
Pattern, The Baby Leggings Pattern and the Knit A Line Baby Dress
Pattern. Be watching for the rest of the Emma pattern series.Overall, this was a very fun sewing pattern to design. I learned a lot and had a great time trying a variety of necklines. I love how it fits my baby as I am sure you will too. I can't wait to get the rest of the Emma series out for you (I say “you”, but I can't wait for “ME” either! Ha!).
 |
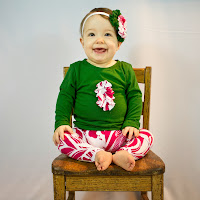
| Look at this sugar. She's so yummy! |
If you have any questions or ideas,
feel free to comment below or write to me at info@mammacandoit.com.
 |
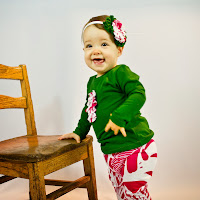
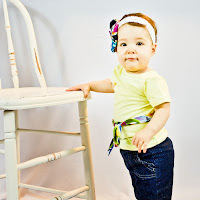
| Look at these baby leggings with the ruffle butt! There's even a rear extender to fit over cloth diapers!! |




No comments:
Post a Comment