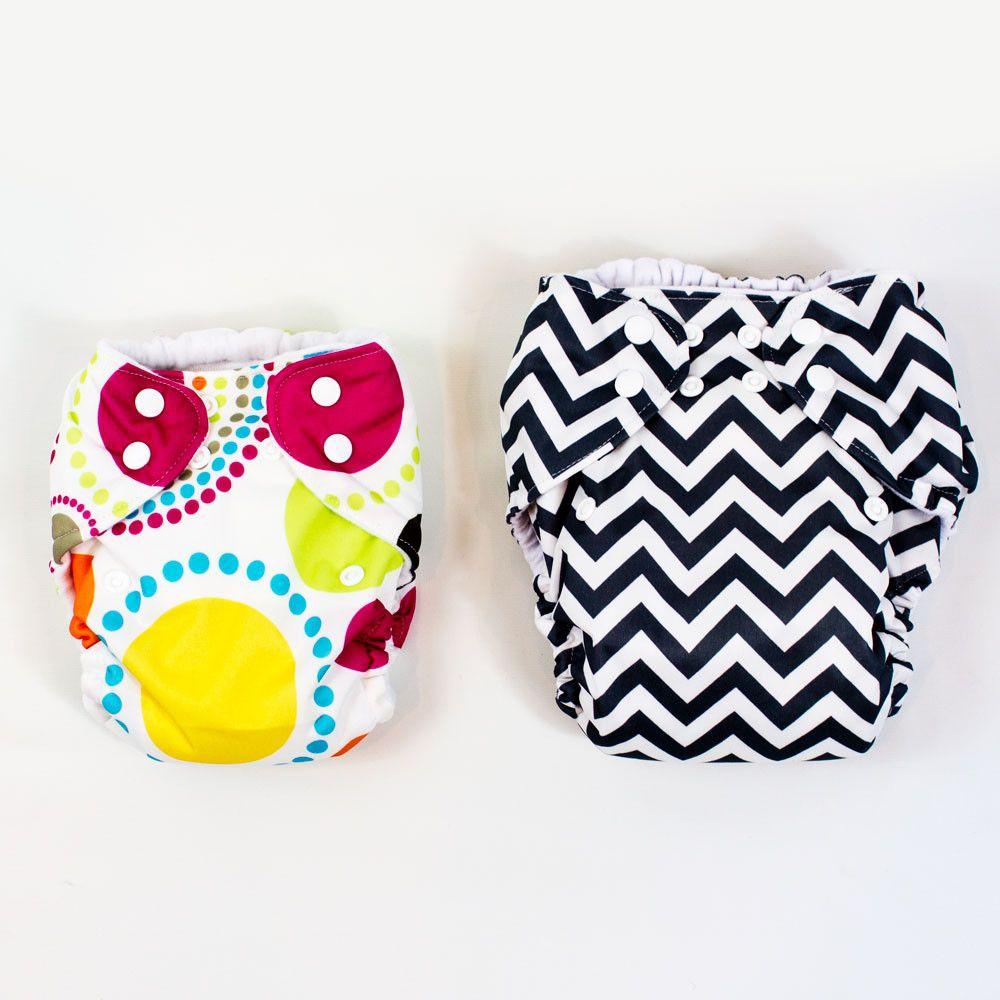
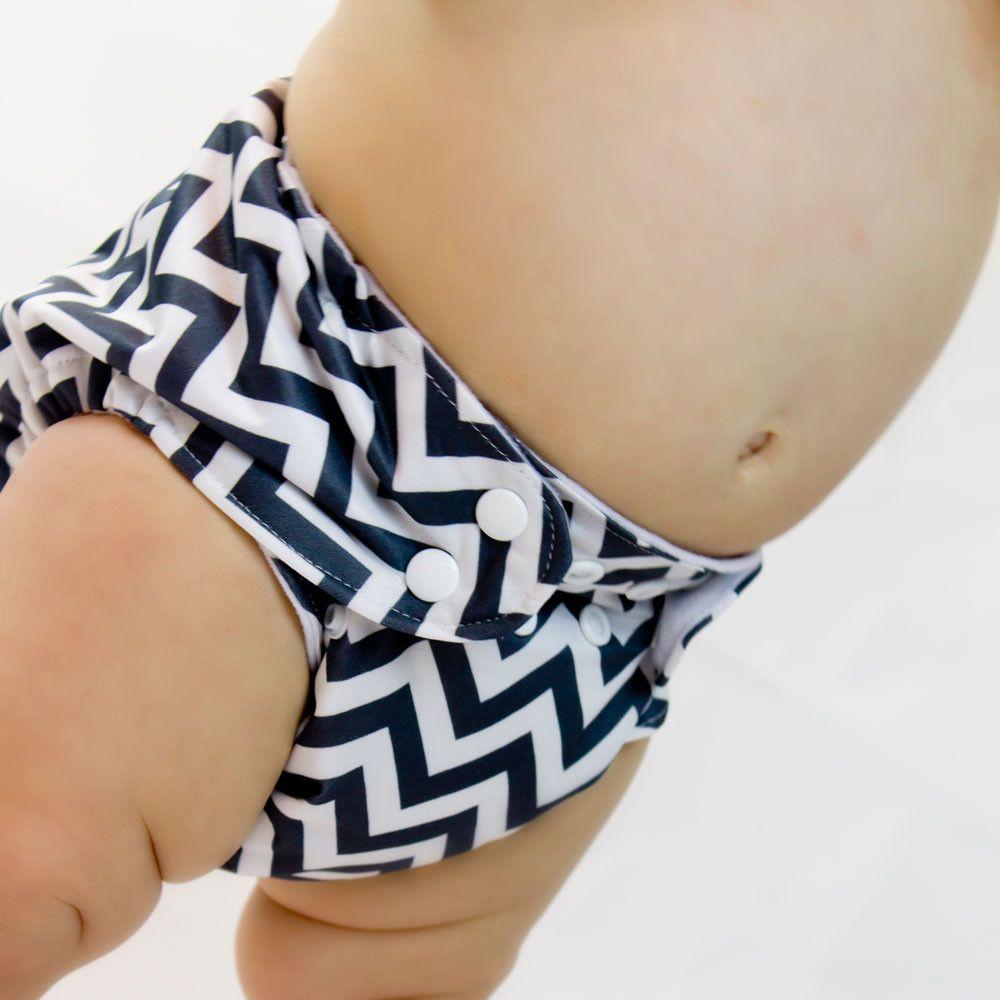
Showing posts with label Baby Diapers. Show all posts

Saturday, April 23, 2016

What is the best cloth diaper?

Are you ready for me to tell you what the best cloth diaper is? I'm talking best of all time. The reason that I love fluff....the reason that I don't mind washing them and hanging them meticulously on the clothesline. Are you ready?

I recently have been on a diaper kick. My current, and unexpected pregnancy has thrown me for a loop, and I realized that I needed a new diapering solution. I had an entire stash of one size pockets, and although I like them incredibly, they weren't holding up to my expectation.


Here's my list of what I needed in a diaper:
  1. A cloth diaper that would get clean easily with a front loader washing machine.
  2. A cloth diaper that I wouldn't hate washing out in the toilet
  3. A diaper that I could recycle my huge stack of t-shirts into
  4. A diaper that's cheap to make. Making your own is cheaper....but still expensive sometimes
  5. A diaper that was fast to make. I make my own, but don't have time to - really!
  6. A diaper that the elastic/snaps would last a long time
  7. A diaper that would fit my upcoming newborn AND my 1 yr old

I have seen and read countless articles on how to use a front loader washing machine with cloth diapers. I've tried all of the tactics. When we moved in August to our new home and traded in 'old faithful' washing machine for a beautiful front loading machine, my cloth diapering adventures became a nightmare. I was stricken with soap filled, rash causing, stink laden, awful cloth diapers. I hated it. I began to hate cloth diapers entirely and put them away. I never got the stink to go away unless I washed them BY HAND in the bathtub. No thank you.

What I needed was something that was natural fibers that would open up to get clean. My microfiber inserts were 2-3 layers thick, and the alova suede just had an odor that I couldn't remove. Blast.
I started by using a diaper cover that I had made for claire 3 years ago. Yes, I put a zebra print on my son. He didn't care. :) I paired it with a prefold that I had laying around. To my suprise, I liked it. It c got clean. And I could re-use the cover. I used a snappi to close it, but it was hard to close around my tubby Elijah. Once he started to poop in them, I didn't like this plan so much. The poop came right out of the prefold and on my lovely zebra print. No thanks. So much for this plan. I wanted something inside that would keep my diaper cover semi clean....not plastered in poo!
Next I tried a contoured diaper. I had whipped up one of these in no time. I wanted it to work SO SO SO bad because it was fast! Nope. Poo-splosion happened and I had a royal mess to dip in the toilet. yuck.
I think it's fair to mention that the reason I kept on this idea, was because I knew that if I could get the cover OFF of the diaper, and any inserts/soakers removable, I would have a cleaner diaper. But the process of GETTING the diaper to the washing machine was making me gag.
That's when I started looking at the rest of my list. Maybe I could find a different solution? That's when I remembered my giant box of t-shirts. I wanted to recycle them, so I started to cut them up into 'prefolds'. I just layed them in the diaper covers  like the prefolds, which didn't help my gagging issue at all. And I tried to make them into contoured diapers too....but it wasn't fixing the issue. I wanted to try elastic in the legs, but I DID NOT want to spend 45 minutes per diaper to make them, so I waited a very very very long time. I finally decided to test it.  I put elastic in the legs of my contoured diapers and VOILA I had a poop-holding piece of fantasticness. It literally took me 8 minutes, the FIRST time I made one. I hadn't thought about the time factor being from the snaps - but by not having snaps on these, I can whip them out incredibly quickly.
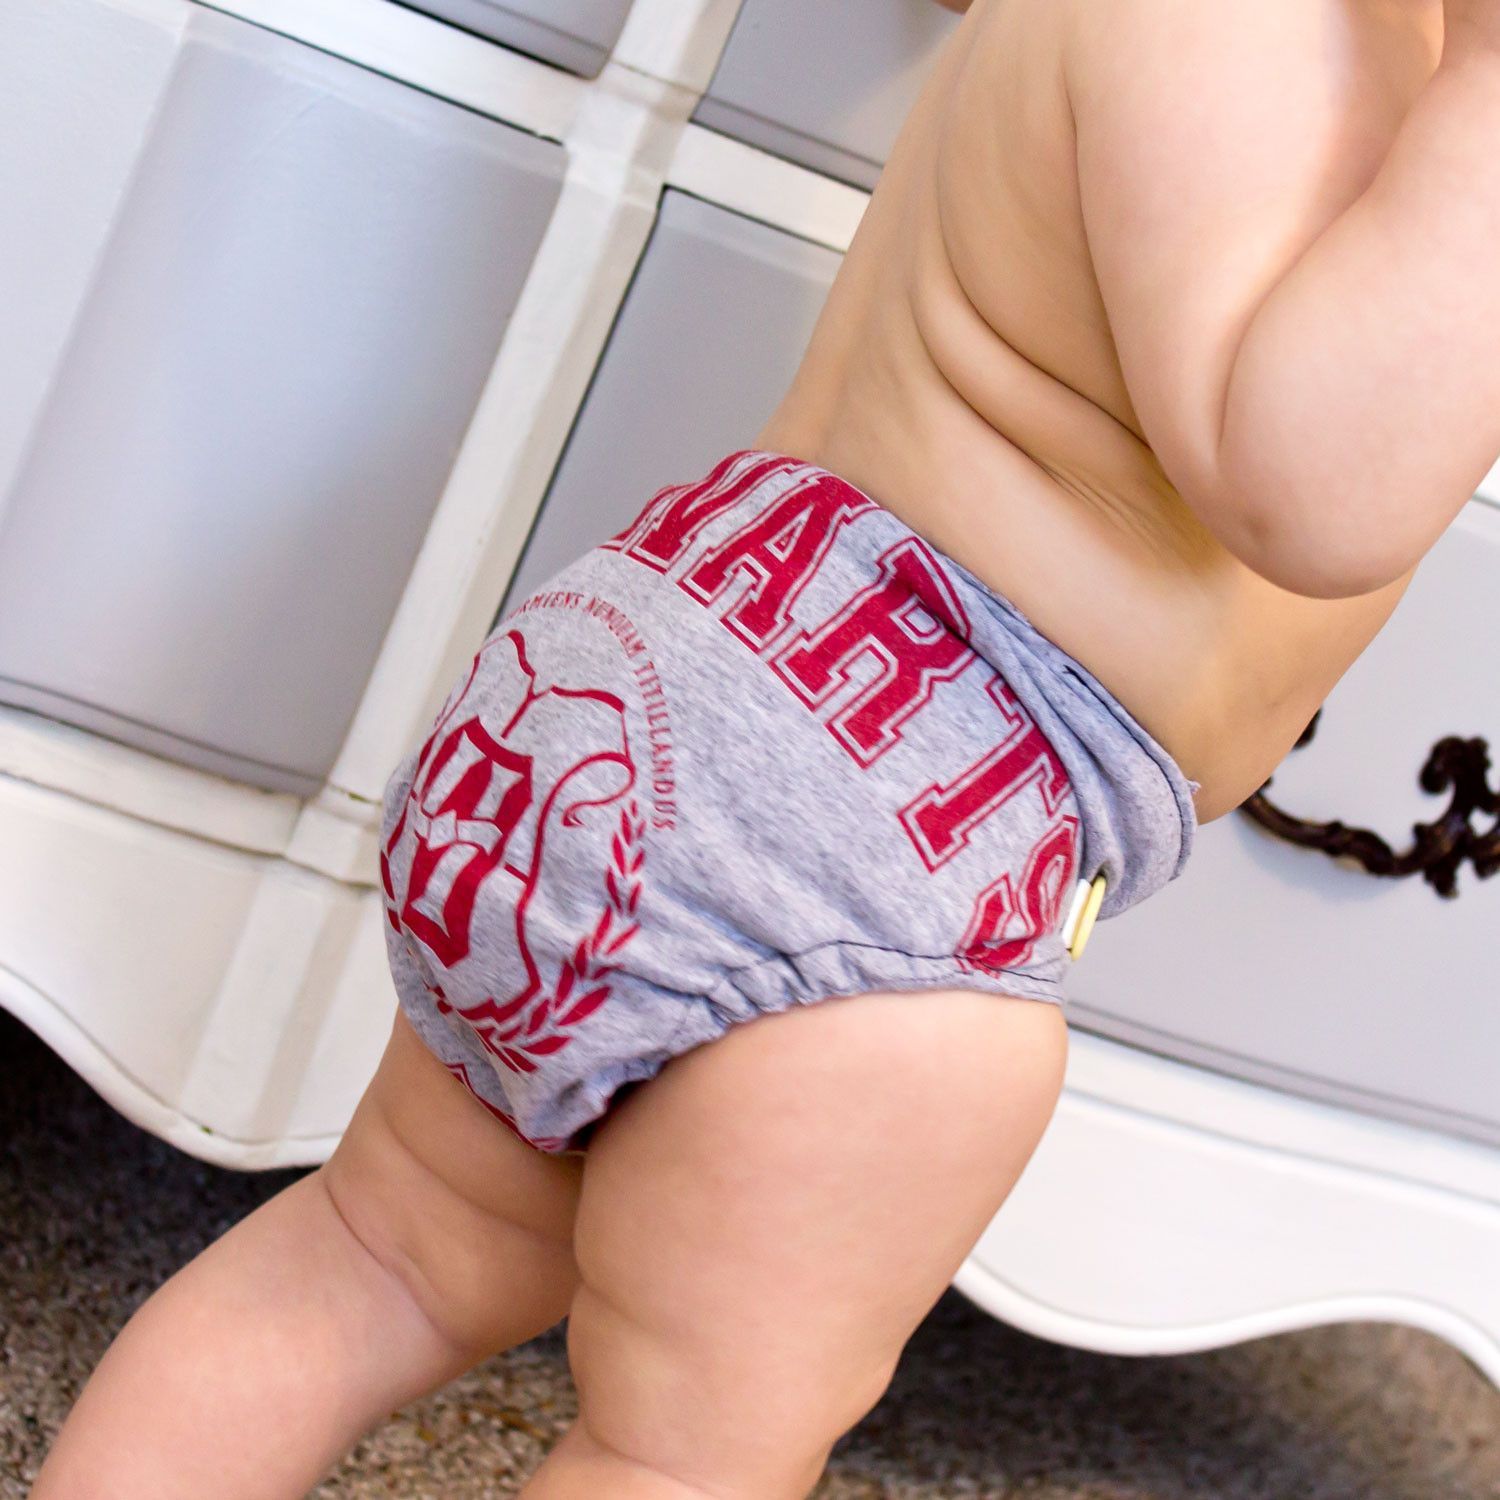
By pairing this fitted diaper with a one size diaper cover, I officially have my ultimate favorite diaper.

So what about the rest of my list? Let me dive into my list of needs and how this diaper answers them all!
A cloth diaper that gets clean with a front loader

The fitted diaper is made of two layers. I leave the middle open so that I can (and do) add inserts. I literally take the bottom of a t-shirt and cut it off - then I fold it. These make the perfect inserts because they come out in the wash and open up. Even the small amount of water that is in the front loading washing machine is able to get these babies clean. Because they are a natural fiber (cotton) instead of microfiber or alova, they don't need as much agitating to get sparkly clean.

A cloth diaper that's easy to wash in the toilet

Because this diaper is separate from the PUL, I don't hate washing it in the toilet to get solids out. It seems that I hate rinsing any cloth diaper that has PUL in it because the PUL either splashes water at me, or holds water while I'm trying to rinse....thus, making it impossible to get all the yuck off. I also don't mind washing it in the toilet because it is very rare that anything gets on the cover, so I only have ONE thing to rinse off (as apposed to the prefold AND the cover during my testing phase).


A diaper that I can recycle t-shirts into

My initial thought with this, was to simply use the t-shirts as a soaker/insert. But I love that I can use a t-shirt for BOTH the diaper AND the insert. What a great way to recycle!


A diaper that's cheap make 

I make my own cloth diapers and I wanted one that was cheap to make. Using the t-shirts for both the diaper and the insert takes a huge cut off the cost. Plus the one size diaper cover means that I only have to make a few of those as well....from newborn to toddler. A set of fitted diapers (20 or so) and 6 covers will literally cost less than $50!

A cloth diaper that's fast to make 

Ok, I'm going to be honest. I love to sew, but I hate sewing things repeatedly. I want to be creative and be done with it. But when I sew cloth diapers, that normally take 45-60 minutes to make, I get overwhelmed after 2. I needed something that was fast to make, so that I could actually accomplish it! This diaper and covers do that. I can literally whip one diaper out in 8 minutes. A cloth diaper cover still takes about 45 minutes to make (because of the snaps), but in all, for a set of 20 diapers and 6 covers, Total time is less than 8 hours. That's something that I can come back to without feeling overwhelmed!


A diaper that will last a long time

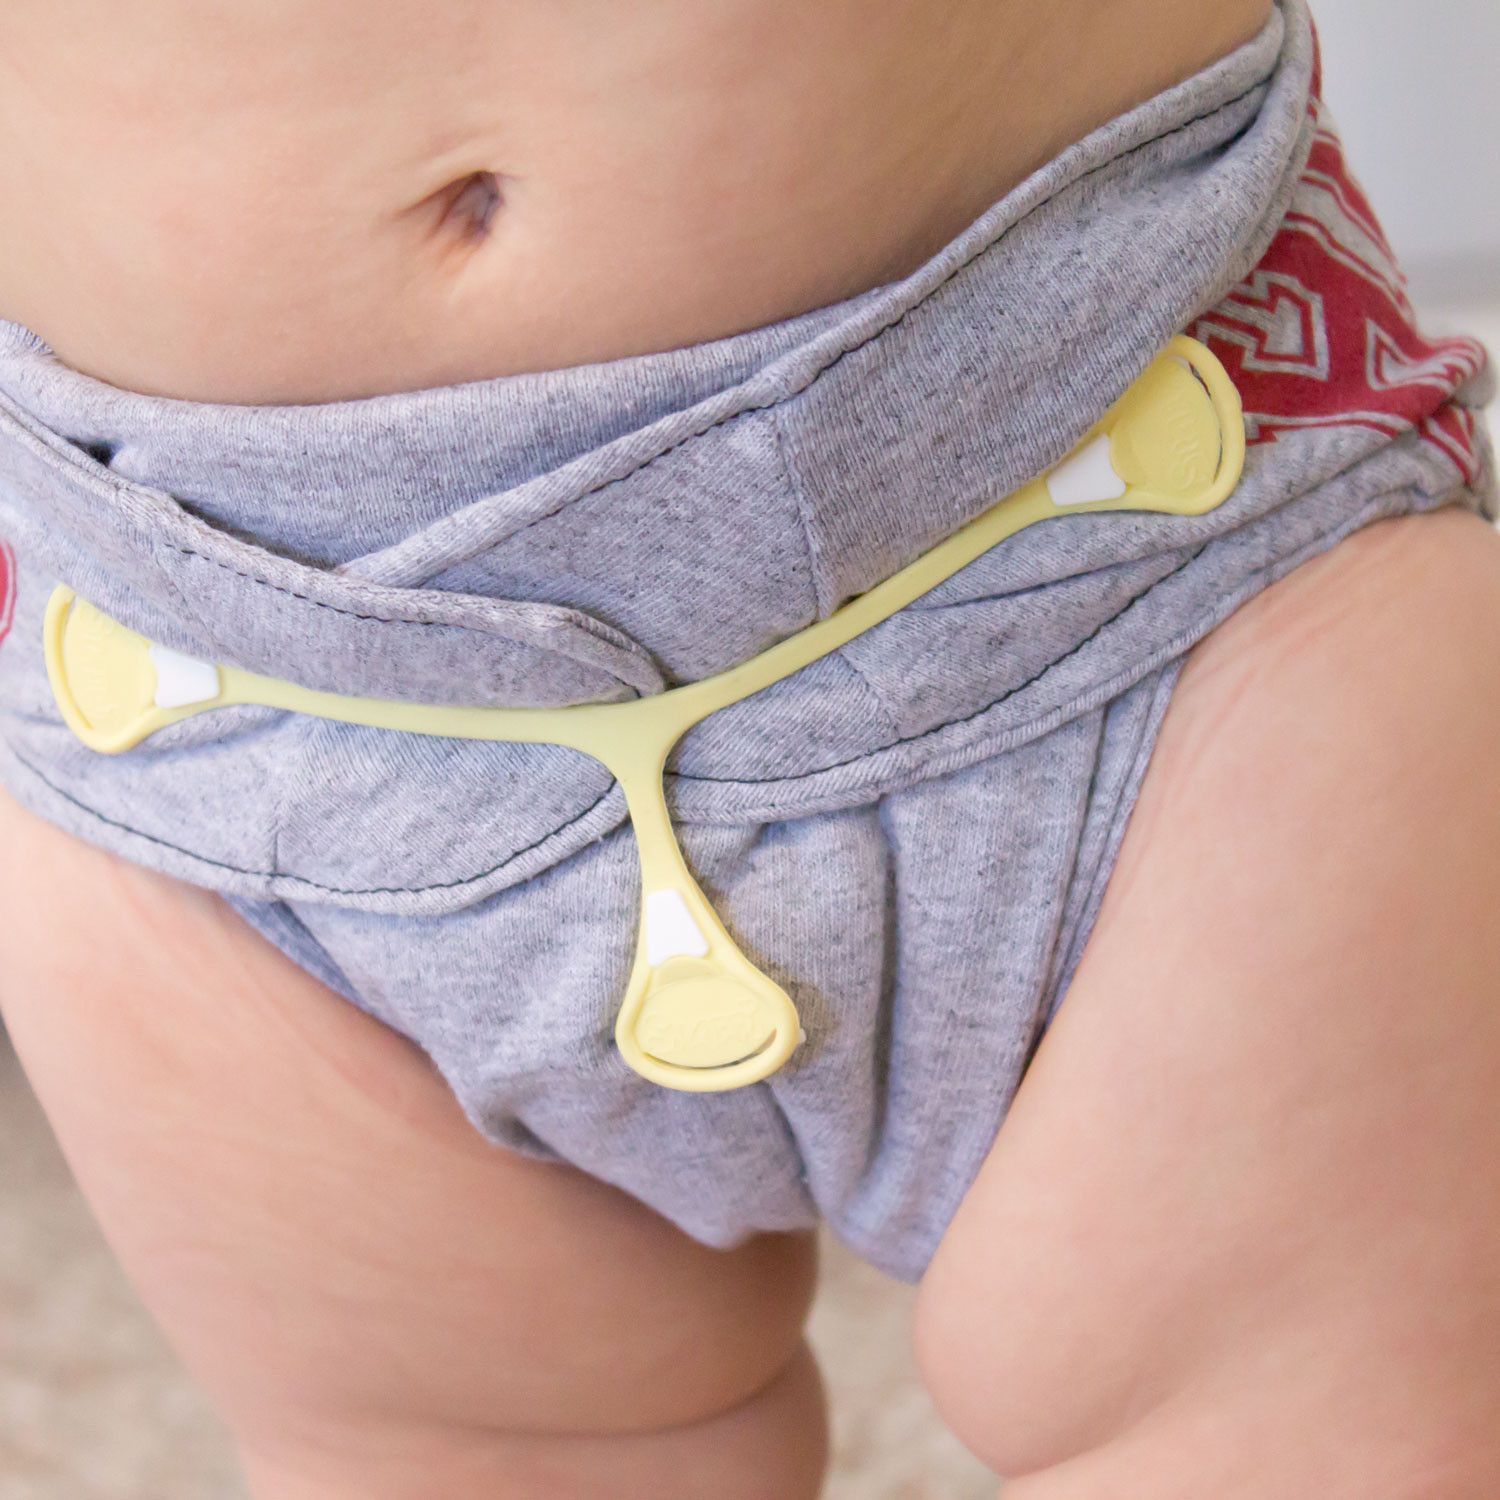
I needed a diaper that would last a long time. There's nothing worse than having a beautiful stack of cloth diapers, that quickly turn into nasty velcro/elastic/PUL that are un-usable.
This diaper design keeps the important cover with the elastic and PUL in best shape of any other diapering system. Because you rarely have to wash them. The elastics in the fitted diapers might give out sooner than the covers, but at 8 minutes to make, I am ok replacing one or two eventually.

A diaper that will fit all sizes

This combines my 'fast to make' and 'cheap to make'. I needed something that would fit all baby sizes so that I can get away with as little sewing as possible. This diaper has the answer. Because it fits all sizes from newborn to 'big', I don't have to worry about making a separate stash for each baby.


I hope this helps you make a great decision on how to cloth diaper your baby. Enjoy the fitted diaper pattern for free. :)

Please also check out my cloth diaper cover pattern. It fits this fitted diaper perfectly! It's a no fuss, less time consuming, wipeable, one size design. You'll love it!

Thursday, April 7, 2016

What type of cloth diapers should I use?

At one point I had an article on different types of cloth diapers, but I can't find it! I've recently had a friend who is asking about the types of diapers out there, and what I think that she should sew for her new grandbaby. This is the perfect, short but sweet, list of what you want to know about the new cloth diaper systems available today. There are many more options available, such as wool, but I do not discuss that here. These are the basics.

Step 1. 
Decide where the diapering is going to be taking place. If you are going to be taking your baby into a day care, or if you are on the go all the time, cloth diapering is still an option. If you are home with the baby most of the time, you can try out a myriad of different products to see what you like the most, before committing to an entire stash of one type of diaper.


Step 2. 
Consider your cost. Diapering babies is expensive. Disposable diapers are an incredible expense. A few years ago, I did a cost comparison article between disposable diapers and one size, pocket, cloth diapers. Prices may have changed some since it was written, but it is still a very good comparison. You can see the article on disposable vs cloth diapering costs here. *I have learned and discovered even better cost options for cloth diapers since this article was written. I'll be discussing that below.


Step 3.
Consider your options of cloth diaper types. There are many, MANY types of cloth diapers available. All of those types have options as well. I'll be discussing the main types as well as my favorites here. You can sew your own with many different cloth diaper patterns, but before you buy, know what you want!


All In One diapers (AIO)

This is what most cloth diaper users gravitate toward when they are starting to cloth diaper their babies. An all in one diaper is literally, "all in one". The diaper is sized similarly to the sizes of disposables, it's either velcro or snaps, and it has the 'soaker' built right in. There is usually a soft, fabric against the baby's skin which pulls moisture away from the body. There is a waterproof cover built right in. There is elastic in the legs, with or without gussets. There may or may not be a place to insert MORE 'soakers' inside the diaper itself. 


The Cons:
AIO diaper is typically the more expensive option because of how many diapers that the user needs. Because everything is built in, there is not the option to re-use the cover. This diaper is washed after every use. The sizes of the diaper range from 3-6, depending on the brand, and you'll need about 20-24 diapers per size. This is time consuming to make yourself, and expensive no matter which way you slice it. There is less adjust-ability for adding/removing soaker fabric for nap times or awake times.

The pros:
They feel like a disposable diapers to people who are new to cloth diapering. There is less room for error. The diapers fit great with each change, regardless of who is doing it. There isn't a need to 'educate' day care providers or husbands on how to use them, because they are easy, and straight forward.

All In Two diapers (AI2)

This is my favorite type of diaper system. An all in two is a diaper system in TWO parts. The soaking fabric and the cover. The soaking fabric can be elaborate, such as a diaper itself (also called a fitted), with wings and elastic and snaps, or it can be simple. A simple example would be a 'lay in' t-shirt, or prefold.

The cover is usually wipeable to use for many diaper changes until it's soiled. You don't have to wash the cover with every change. 


Cons:
It has a bit of a learning curve. You'll want to train caregivers or husband how to use them properly. 

Pros:
The covers last longer (The fabric for the cover is the most expensive part of the diapering system), the elastic in the legs lasts longer, they are faster to make because instead of 24 diapers, you only need about 12-15 covers, they are significantly cheaper than other types of diaper systems. AI2's are usually fast drying since the insides come apart (which is cheaper in electricity and better for the diapers in general). 


Pocket diapers

These are my second favorite. A pocket diaper is similar to an AIO, except the insert (soaker), is entirely removable. It usually needs to be removed before washing, but after washing, you stuff the soaker back into it and it becomes just like an AIO. This is the better option to an actual AIO because they are better washing and faster drying.

Cons:
Its gross to remove the soaker from the diaper after use sometimes. It takes a few extra minutes to stuff the soaker back into the pocket on washing day. You must change the entire diaper with each diaper change, which means that PUL (waterproof fabric), elastic, and velcro won't last as long.

Pros:
They are a great way to get the AIO functionality without sacrificing cleanliness. The soaker fabric can be made out of whatever you want, and if it's a folded soaker, it will open up, clean better, and dry faster. 


Step 4. 
Consider your options of features in the cloth diaper that you want.


One Size Diapers


One size diapers mean that they are 'one size fits all' from about 8 lbs to 32 lbs. This is an excellent option for people who are using the AI2 or the pocket diapering system. Typically there is a snap down rise, or adjustable, buttonhole elastic which allows the diapers to fit such a wide range. One size options are an excellent choice to keep costs and time spent sewing down to a minimum.
one size fits all diaper pattern
Get the One Size Fits All Diaper PatternHere

I have a TWO SIZE diaper system pattern available on my website that is a two size AIO. This is an option for the person who wants the convenience of the AIO without the cost of so many sizes. 


Get the Two Size AIO Diaper PatternHere


Gussets

Some people are crazy for gussets. I am not. I personally feel like they are bulky and unnecessary. I don't find that they hold in any extra 'stuff' more than un-gusseted diapers. If the fit is right, without gaps on the legs, you diaper will hold up exceptionally well without gussets. My pattern for the one size pocket diaper has an option of gussets though for the die-hard gusset lovers. :)


Elastic

Some diapers have FOE elastic, and some have hidden elastic. FOE stands for "fold over elastic" which is used on the edges of some diaper covers or diaper systems. It's usually quite soft and lasts quite a while. The FOE elastic usually goes around the entire diaper. 
The hidden elastic option is when the elastic is hidden inside a casing in the legs and back of diaper. This is my preferred elastic method. This is the easiest to replace if the elastic gets worn out after multiple babies. I also find that FOE elastic gets pilled and snags easily in the washing machine if you have any velcro on your diaper stash at all.

Foe around the entire diaper cover.
This cover also has extra gussets.


Snaps vs velcro

This cloth diaper cover desperately needs velcro replaced

Snaps are my favorite hands down. Velcro is nice for the person who is on the fence about cloth diapering and wants a good way to keep the diapers as close to disposable as possible. The problem with velcro is that IT IS DISPOSABLE itself.  After only a few washings, you will notice big time pilling in the velcro and that it needs to be replaced after only a short time. Plastic/resin snaps are incredible. They will outlast the diaper itself, they will look brand new until you stop using them. They are strong and toddlers can't remove them.

Snap in soakers and hip snaps

Some diaper brands are big on making theirs seem like the best with multiple options such as hip snaps and snap in soakers, and other snap like functionality. Don't buy into it. A hip snap is a snap that one puts on your baby's hip of the diaper to keep the front wings from 'sagging'. Sagging only happens when a diaper doesn't fit properly, or if it's loaded down with contents that need changing.
Snap in soakers seem good in theory, but it really is an unnecessary expense of time and bulk.
This shows the hip snap on a cloth diaper.

Snappis, boingo,

This is a snappi. It's excellent for using instead of pins if you wanted to attach a prefold to baby (instead of a lay in). They are very inexpensive from greenmountaindiapers.com


This is the boingo. These are great for attaching to a prefold or flat diaper to hold in place around baby.


Important notes for front loading washing machines


If you own or think that you will own a front loading washing machine, there are some tips that are very very important to know when choosing cloth diaper options. 
Up until I owned a front loader, I didn't know that it was any different for cloth diapering. It IS. This is what I have learned.

It's important to always remove soakers from pocket diapers. 
I never had to with my top loading machine. They agitated right out and got plenty clean before. With a top loader, there is less water used, so the soakers don't agitate out. They usually form a ball inside the pocket diaper and don't get entirely clean. 

Wash with very little soap

Oddly, you don't need very much detergent to clean cloth diapers in a front loader. I use about a tablespoon for an entire load, and sometimes I wonder if that's too much. I wash on hot/cold with the extra water function enabled. Then I do a repeat cycle WITHOUT soap to make sure it's all rinsed out. Every couple weeks, I will do ANOTHER repeat cycle to make sure that there are not suds in the diapers at all. If there are suds, I will repeat the 'soapless' cycle until the suds are non existent.
I also find that I never have to use bleach anymore, nor do I want to. Because the soap is so hard to rinse out, the bleach is as well....which is very very very hard on the fabrics in the diaper.

Try to have as many removable parts as possible
If you can manage to use a pocket instead of an AIO, do it. If you can use an AI2 instead of anything else, DO IT. If the soakers in the diaper can be folded into shape (like a prefold or tshirt) instead of serged together into a bulkier, more convenient shape, then go for the folded. The more 'removable' and 'open' your diaper can be, the quicker it will get clean, and the quicker it will dry. The more 'attached' and 'convenient' the diaper is, the more rinsing you will have to do on washing day. 


My ultimate favorite diaper stash

My very favorite diaper stash, for all the reasons that I wrote above, is the One Size AI2. I use a fitted diaper that is made from t-shirts, and I make it fast by simply using a snappi instead of adding snaps. I use a diaper cover that uses all snaps and no velcro. I also make them with hidden elastic instead of FOE. I never use hip snaps. I reach for these first!
You may find that you hate this idea! It's totally ok if you have a different opinion! I've cloth diapered 5 babies before I finally decided on a favorite. Make a little bit of everything if you are unsure, and see what you reach for first, how they wash up, and what works for your family. 

It's kind of funny to say that my favorite is the AI2, because I actually don't have a written pattern for it yet. I am working on that later this month, so be watching!

Do you have a favorite diaper stash? What are your reasons? If you've cloth diapered for a while, what are some pointers that you think others should know?

Monday, April 4, 2016

Can I use a cotton fabric on the outside of cloth diapers?

I have customers ask me about once a week if they can alter my cloth diaper pattern to have a cute cotton fabric on the outside of their cloth diapers. As much as it would be adorable, you simply don't want to do this!


 "If I get the one size pocket nappy is it possible to sew it without the pocket? I'm wanting to make one size nappy covers, hopefully covered with cotton fabric on the outside, but can't find any covers that specifically do this. Is it likely to leak every where?"

"Is there any way that I can add cute quilting fabric to the outside of my diaper, as a layer, so that the PUL doesn't show? I have some really nice prints that I want to show off!"

"Do you think a diaper cover with a printed cotton fabric on the outside would be doable? Do you have a tutorial for this?"

" What if I put a layer of cotton quilting fabric on the outside, sandwiching the PUL fabric in the middle of the diaper so that the outer layer of fabric is cotton and is what shows instead of the PUL?"

Seriously. People want to do this. And I understand! In fact, with my second baby, I was certain that I was going to have an entire stash of cutsie fabric covered diaper covers. I slaved away and made at least 2 dozen adorable diaper covers. I showed them off to my friends and family proudly. Then came time to use them on my sweet pumpkin. When I started using them, although they were incredibly adorable, I was in for an incredibly unpleasant suprise. They leaked like nothing else.
I used polyester thread, thinking that wicking wouldn't be a problem.
 ***Side note: "wicking" is a term used in the cloth diapering community for "leaking" where it isn't supposed to.***
What happened? Every pin hole, thread hole, edges of legs and tummy area were entirely soaked, even when the diaper wasn't all that wet! I had plenty of soaker fabric in my covers, this shouldn't have happened right?! 
Cotton is an absorbing fabric. No matter what you do. If you have a cloth diaper with cotton attached to it in any way, it's going to be wet. You can count on it.


So what options are there to have a cute fabric on my baby without it being boring PUL?
If you want to have an outer layer (which is what I prefer when I make diaper covers), use something that is 100% polyester. Minky fabrics, fleece, satin, microfiber, many upholstery fabrics, crushed suede, peach skin, faux suede, Jersey knits (only 100% polyester), jacquards, linen (only 100% polyester), and velour.

There are even more types of polyester fabrics available at many stores, but I wanted to give you a quick list: https://www.fabric.com/apparel-fashion-fabric.aspx?fiber-content-range=100percent-polyester

Another option is to look in the sheet section at your local super store. I'm not entirely fond of the big box stores, as you may know, but many times, you can find top sheets or pillowcases that are 100% polyester for a bargain! This way, you can make your whole diaper stash for next to nothing.

I hope that helps you understand that you absolutely should NOT use cotton fabric on the outside of your diapers, and that you CAN still use cute fabrics on the outside - namely - Polyester ones.

What about you? Have you tried using cotton on the outside of your diapers? Or other fabrics? Tell me about your experience!


Tuesday, March 22, 2016

Where do I buy PUL fabric

An email that I get frequently is, "Where do I buy PUL fabric". People are always worried about making cloth diapers because PUL fabric isn't something they have ever worked with. The biggest fear though is, "Can I buy it in my local fabric store?". Not usually.
one size diaper pattern
Some fabric stores have a dedicated cloth diaper section, which is becoming more frequent since the boom of "going green". However, it's usually best to buy online to make sure that you are buying from a credible source, and one that has tested their PUL to last for many washings. It's possible that JoAnn.com has PUL, but more than likely (from rumors that I've heard), it will not stand up to rigorous cloth diaper wearing and washing routine.
cloth diaper pattern

The very best place that I have found to purchase PUL fabric is http://www.diapersewingsupplies.com/. They are professional and friendly if you call and have questions. They give you multiple ideas and sewing tips on the phone or email as well. My orders always get shipped the next day after I place my order and I am always pleased with the product.
cloth diaper pattern


I give you many tips in my sewing patterns on how you can easily use it for your cloth diapers or sandwich bags....but they also give you many more tips on using cloth diaper fabrics.

So there you have it! That is where you buy PUL fabric. Now get yourself an awesome diaper pattern and make some new fluff for your baby!
Cloth diaper pattern


Thursday, March 17, 2016

Non Profit Diaper Design - helping in a creative way

I'm really excited as this week comes to a close. With it, also comes the end of a project that I've been working on. A Diaper project. My favorite.

Recently a non-profit, ministry, outreach company found me. They asked if I would make a few 'simple changes' to a cloth diaper design that I had. I frequently have customers asking if I can tweak things for them, so I figured I just had to tell them simple directions on what they wanted.
After a few emails, however, I discovered that they wanted an entirely new design, complete with their own thoughts and ideas.
It turns out that this organization is committed to helping mothers worldwide. They have their hands in the crisis situations, rescuing women and families from trafficking, evacuees, abuse, and many other avenues. They are hiring a team of these rescued women to sew cloth diapers to raise money for their cause. What an amazing ministry!
They hired me (ME!!) to design this diaper for them. It's been a series of turns and changes, but I will be sending the final version this weekend. I'm stoked!

I usually only work for myself, but this has been such a valuable opportunity - to not only help others, but learn how to design for someone else. I'm so thankful.
I have used one of the earlier versions of this diaper design and modified it to my flavor. I have it for sale here.
It's an All In One diaper pattern. Normally AIO diapers come in multiple multiple sizes. This system is only TWO sizes for a perfect fit on any baby from 7-35 lbs. You'll love to add it to your fluff stash. I hope that you love what it represents as you add these to your sewing project list.


Every time I'm diaper making and I come across this pattern, I will remember what a great opportunity this was.

Have you ever had an opportunity that turned out to be unexpectedly amazing?

Monday, March 14, 2016

How to fix a plastic snap

I love my snap press. It makes me happy to attach great snaps to anything. Whether a diaper, or clothes, I know that the snaps will outlive the item that I'm making. Unfortunately I tend to fly through my projects sometimes, and that can make for some 'snappy' disasters. I frequently attach a snap backwards or in the wrong place. Then I'm stuck with it. What makes matters worse, is that snap attachment is almost always the last step to a project!
I have a new solution! I made a quicky tutorial video to show off the new way that I'm removing messed up snaps.

If you can't watch the video, here's the quick version.
My husband had a soldering iron in the garage that never got used. It has a pointy tip on the end and it gets really hot! If your husband doesn't have one, they are very cheap on amazon:


If you put the snap on wrong, simply heat up the soldering iron and put the pointy tip into the snap. It will melt. While it's hot, pull the snap part. It's that simple! It comes right off! Just be careful not to lay that soldering iron on anything in your sewing room or you'll have a melted or burned mess on your hands.


Monday, March 7, 2016

Two Size AIO Diaper system

Recently I was asked to make a new diaper design. Diapers are always my favorite patterns to work on, so I eagerly took the opportunity!
My client wanted an AIO cloth diaper. That's "all in one" if you don't know. All in one simply means that you can literally take it out of the washing machine and put it on your baby. Nothing to remove, nothing to add, nothing to pin or snappy. An AIO is literally ALL IN ONE.

I like AIOs, but since 2009 I have put them on the back burner and I've been using ai2's. I'm sure that I'll write about the details on that sometime, but for now, we'll put a pin in it. 


I forgot how much I loved the cushy feel of an AIO. The ease of use. Oh my! Just put it on and go!
My client wanted an extra insert/doubler that would snap in. I liked that idea and ran with it. This doubler would be perfect for naptime or night time and would fit perfectly into this diaper!
They have sergers that they are planning on sewing with, but don't worry....I made the pattern compatible with a regular sewing machine. If you have a zig zag stitch you can whip out these doublers without any issues at all!


I wanted to give them something that was ACTUALLY aio though, so I wanted to make sure that the sewn in soaker would be adequate. In so many patterns that I've seen, the soaker is so small (so it's not too bulky), that you actually HAVE to use an extra insert/doubler to make it work properly. I didn't want my customers or their customers to have to worry about that, so you'll find the perfect size attached soaker with perfect placement marks included in this pattern.


My client originally wanted something that was a two part system that went all the way down to 5 lbs. They weren't entirely realizing though that a baby at potty training age is frequently around 30-35 lbs. That's a huge range. As wonderful as it seemed initially, I found that it's just not feasible to put a 35 lb diaper range that fits a 5 lb preemie. After a couple talks and some working on it though, we got the pattern situated to be a 7-16 lb small size and a 15-35 lb large size.
It's fantastic.


But don't worry, I kept my original plan on the newborn diaper, which fits 5-12 lbs. I'll be making an entirely separate pattern/tutorial for that.

You'll notice that all of the pictures have snaps. Yes. This design is a snap only one. However, if you are in love with velcro, feel free to alter it to suit your needs! I just find that snaps hold up better to wriggling toddlers and multiple washings. They might be a little more tedious to put on initially, but well worth it.
I have an excellent source that I buy snaps from and I share that on my  "supplies I love" page.


Once we had the system sizes worked out, from there I was perfecting the shape. The legs will always fit nice and snug without leaking. The back has a wonderful amount of elastic in it as well. Because of the sewn in soaker, it has a rigid, yet pleasant feel that I'm sure you will love to put your baby in.

On my first trial, I put this diaper on my baby Elijah. He's 25 lbs. This is the size Large diaper and it's rise is unsnapped. He isn't walking yet, so once he starts, I'm sure that I will have to adjust the rise and waist as he slims down.
Did I mention that the rise has snap downs on both the small and the large? The rise adjusts from 14.5, 16, 16.5, 17.7, and 19. WHOA! Talk about perfect fit for any baby!

oh those chubby baby legs. I could just eat him up!


On such a busy baby, this diaper has to do the trick of staying put. My client was certain that it needed hip snaps, and I put them on the pattern. However, after wriggling and crawling, and crazy days, I found that the hip snap wasn't necessary...and in fact, it was kind of a pain to put on - so don't worry! I won't make you put it on in this design.


Will you look at that snazzy profile! 
That's a beautiful diaper if I do say so myself!


All in all, I love this design! 
If you are just starting to cloth diaper, this is an excellent way to get your feet wet, or even make an entire stash! You'll love that there's only two sizes to worry about, which will save time and money (instead of making 4-6 sizes)

Click the image below to see the new AIO Diaper pattern up and running!

Friday, February 15, 2013

Diaper Cover Patterns - Read before you buy anything


Understanding how diaper cover patterns are constructed will help you choose which pattern to use.


When shopping for a baby diaper cover pattern, whether free or paid for, you are going to want to consider how it is constructed before you do anything. This is about fancy diaper covers, not cloth diaper covers.
Below is the low-down on diaper cover patterns & tutorials to take the guess work out for you so that you don't waste time or money.
If you want to skip all the reading and check out my diaper cover pattern, go for it! You won't be disappointed!


Types of Diaper Covers and ways that they are constructed:

  • Cloth diaper covers

    • These are used to cover a cloth diaper to make it waterproof. This is not the type of diaper cover that I am discussing today.

  • Single layer diaper covers

    • Sewing in elastic
      • Can be made with elastic touching and pinching the baby's skin
    • Bias Tape Elastic Casing
      • Diaper covers can be made by using biased tape as a casing for elastic around the legs and waist. This keeps the elastic off of the skin but can be a pain to work with so I would call it intermediate level sewing. By using bias tape, the leg of the diaper cover will come down a bit more then typically desired.
    • Fold over elastic casing:
      • Diaper cover patterns frequently are made this way, but it is a bit tricky. In a nutshell, you fold over the raw edge inward and sew a casing for elastic in the waist and legs. I personally don't prefer this way because  I like things to match up when I sew them....and the leg holes DO NOT match up when folding over the casing.
    • Using FOE elastic
      • very few diaper covers use FOE (fold over elastic) as a binding. This is a neat idea, but there are limited colors of FOE that would match fabrics that you might be using.

  • Lined diaper covers

    • The diaper cover pattern that I have is made this way. I use a lining to create elastic casings. This way, most seams are completely hidden as well as the elastic. Everything matches up properly everytime so you don't have to worry about tearing out stitches.
Diaper Cover Pattern


But what about ruffled diaper cover patterns?
These are also constructed in a few ways. 

  • Ruffles

    • Diaper cover patterns often will be for ruffle diaper covers. These are SO cute! But what happens if you need to make a diaper cover for a boy? Do you HAVE to add ruffles?
      • Many instructions will have a multi-pieced tutorial for ruffled diaper covers that do not include instructions to make a regular, UN-ruffled diaper cover.
    • My pattern and tutorial includes both! The Ruffle diaper cover & the regular diaper cover.
regular diaper cover pattern
  • Types of ruffles
    • There are the type of ruffle that is ruffled on the top and frilly at the hem
    • There are the type of ruffle that is ruffled in the center and frilly at two hems.
      • My diaper cover pattern has a ruffle that is on the top
diaper cover pattern, ruffle on top

  • Serger rolled hem or Sewing machine hems

    • Before you purchase a pattern, you need to make sure there is directions for the machine that you have. For example, many people only have a sewing machine and not a serger - those people need a pattern that is geared toward sewing machines. Otherwise the directions for the ruffle will keep you guessing.
    • My pattern has directions for both serger & sewing machine instructions so you can use either!

diaper cover pattern sewing machine   diaper cover pattern serger

Elastic measurements - do they exist or do you have to guess?

  • Measure it yourself or Guess

    • It is VERY common in diaper cover patterns that are circulating around the internet for the author to say "measure the waist" and use that measurement. While that might be good, what about if you are making the diaper cover for a gift? Or what if you are making the diaper covers for your unborn baby...or even a few sizes up? This doesn't make any sense to me.

  • Wrong elastic measurements

    • It is also very common for elastic measurements to be COMPLETELY OFF! Whoever thought that a nb waist is 18-20" is out of their mind. Yet I frequently have customers who tell me of their previous experience with these HUGE elastic measurements.

  • Real elastic measurements

  • My pattern gives REAL elastic measurements. If your baby is a bit larger then most, then by all means measure and use that measurement. If you are like me, you are sewing at naptime though and require the measurements on hand.


Lastly, my take on the diaper cover pattern options

By now you have probably seen that I obviously have my own design. :) I hope you try it. I have 100% money back guaruntee with my patterns...because I know you'll love it if you use it.
Since you are searching for a diaper cover pattern, just use mine. You'll love it - and you'll especially love how it looks, fits and feels on your baby. The best Diaper Cover Pattern ever is just a click away.

best diaper cover pattern