Wednesday, June 15, 2016

How I made my crib skirt from a sheet

This is a simple tutorial on how I made my crib skirt from a sheet. It's a ruffled skirt that fits any crib but I'll tell you some hints on how you can tailor yours to fit your needs. This could be for a beginner, but I don't explain the basting or hemming process. :)
how to make a ruffled crib skirt
Step 1. I started with a twin size sheet. It measured 66x96". I threw it in the dryer to get the wrinkles out and drew a diagram on how I wanted to cut it.
crib skirt tutorial step 1

Step 2. I chose to tear it instead of cutting it. It was super fast. The first thing that I did was tear off all of the hems.
crib skirt tutorial step 2

Step 3. Cut (or tear) the pieces.
My perfect length for the crib skirt was 9". So I started with a 10" length. This saves room for 1/2" worth of hemming or sewing on each side. If you want your skirt longer or shorter, adjust as necessary.

Cut 5, 10" x 60"  pieces (60" give or take a few) for the skirt
Cut 1, 28.5" x 53" piece for the body
Here is the sheet cutting diagram.

crib skirt tutorial step 3

Step 4: Attach the 10x60" strips together on the 10" ends. This will make a verrrrrrrrry long strip.
crib skirt tutorial step 4

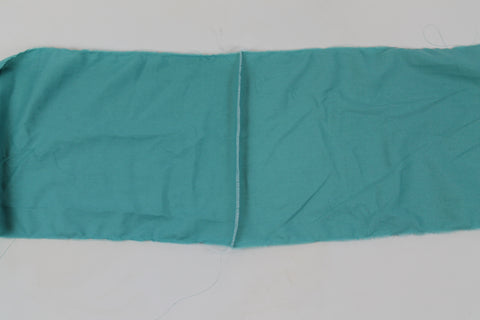
Step 5: Hem or serge one long edge.
I chose to serge mine with a rolled hem because I like the look of the contrasting white fabric for my nursery. You could easily just make a small hem.
crib skirt tutorial

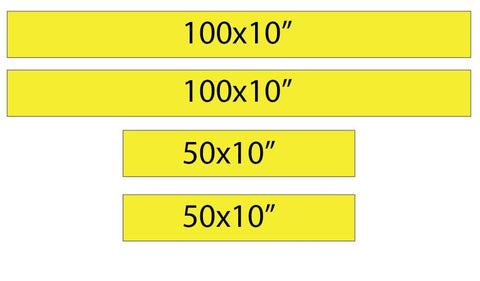
Step 6: Cut your pieces. The total length of your long strip should be a little more than about 300 inches.
Cut 2, 100" strips and 2, 50" strips from the long strip. Discard any remaining strip.
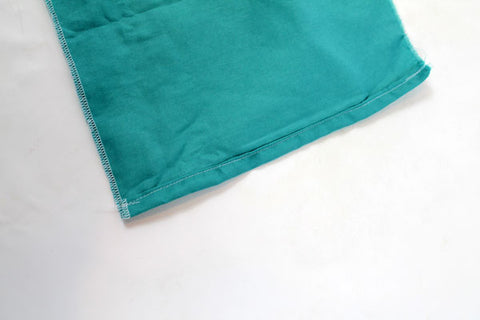
Step 7:
Hem the 10" sides of each of the 4 strips.
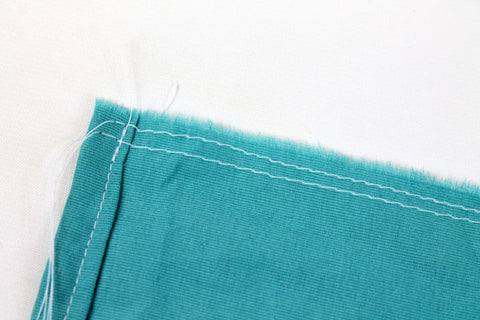
hemmed side of crib skirt

Step 8:
Sew a double basting stitch on each 'raw' edge of each short, 50" strips.
double basted raw edge of crib skirt

Step 9:
Gather the raw edge of the 50" strips by pulling on the bobbin threads of the basted stitches.
gathering crib skirt ruffle

Step 10: Lay the ruffled edge onto the 53" edge of the body piece. This will help determine how short to make the ruffled edge.
ruffling the edge of crib skirt

Step 11: Tie the threads once the gathers are at the proper length. Then evenly disperse the gathers.
tying ends of gathers

Step 12. Sew the ruffled edge of the skirt onto the raw edge of the body piece. I sewed mine so that none of the gathered stitches would show. It's pretty rough because I didn't pin it. I figured with a cute ruffled edge, you wouldn't notice if it was a tad uneven.
sew on the ruffles

Step 13. After the short strip of ruffles are done, do the large strips of ruffles.
When you attach the large strips to the body piece, overlap the small strips about 1/2-1" so that there won't be any raw edges when you are finished.


Step 14. Snip all of your strings and enjoy having a super oober cute ruffled crib skirt!
ruffled crib skirt diy

Monday, June 13, 2016

Reversible Baby Romper Tutorial

Recently I was asked to design a reversible baby romper for baby boys. Cute baby boy clothes are hard to find patterns for, so I decided that I was up for the challenge. Elijah is still leary of modeling for me, but I did snap a few adorable pictures of this process so I hope you enjoy it!


how to make a reversible romper


The first thing that I did was start with my shorts pattern and my reversible jumper pattern. I wanted something that fit as great as the jumper did on the bodice, but with the great fitting shorts as well. After almost an entire day of adjusting pattern pieces and finagling ideas, I finally had my design. It couldn't be more perfect! I needed it to have a large range of sizes, so you'll find this one in sizes newborn to 36 months.
A partial screen shot of my pattern in the design program


I knew that I didn't want the typical romper design which had a seam up the front. I wanted something with a bodice that one could embroider on, or have a cute contrasting fabric. I also knew that I wanted this pattern to be used with woven fabrics, so it had to fit perfectly.

romper pattern great fit


So after I made the initial romper, I was hooked! It's just beautiful  handsome and fits like a dream!
I even made a tutorial video to go with it! You can find the video here:
https://mammacandoit.com/pages/how-to-sew-a-romper

Once the pattern was made, I sent it to the person who originally requested the design. She gave me great tips on what I could do to improve the pattern as well as a beautiful picture of her first one that she is putting in her etsy shop!
how to make a romper
Aren't these adorable?!!?!

Today, after edits, I am finally posting the final pattern and have it available on my website. You can find it here: Reversible Baby Romper Pattern

Overall, this project was really fun and I would love to do another one that someone has for me! Special requests are so much fun!